Behold, the 3D Energy Tank:
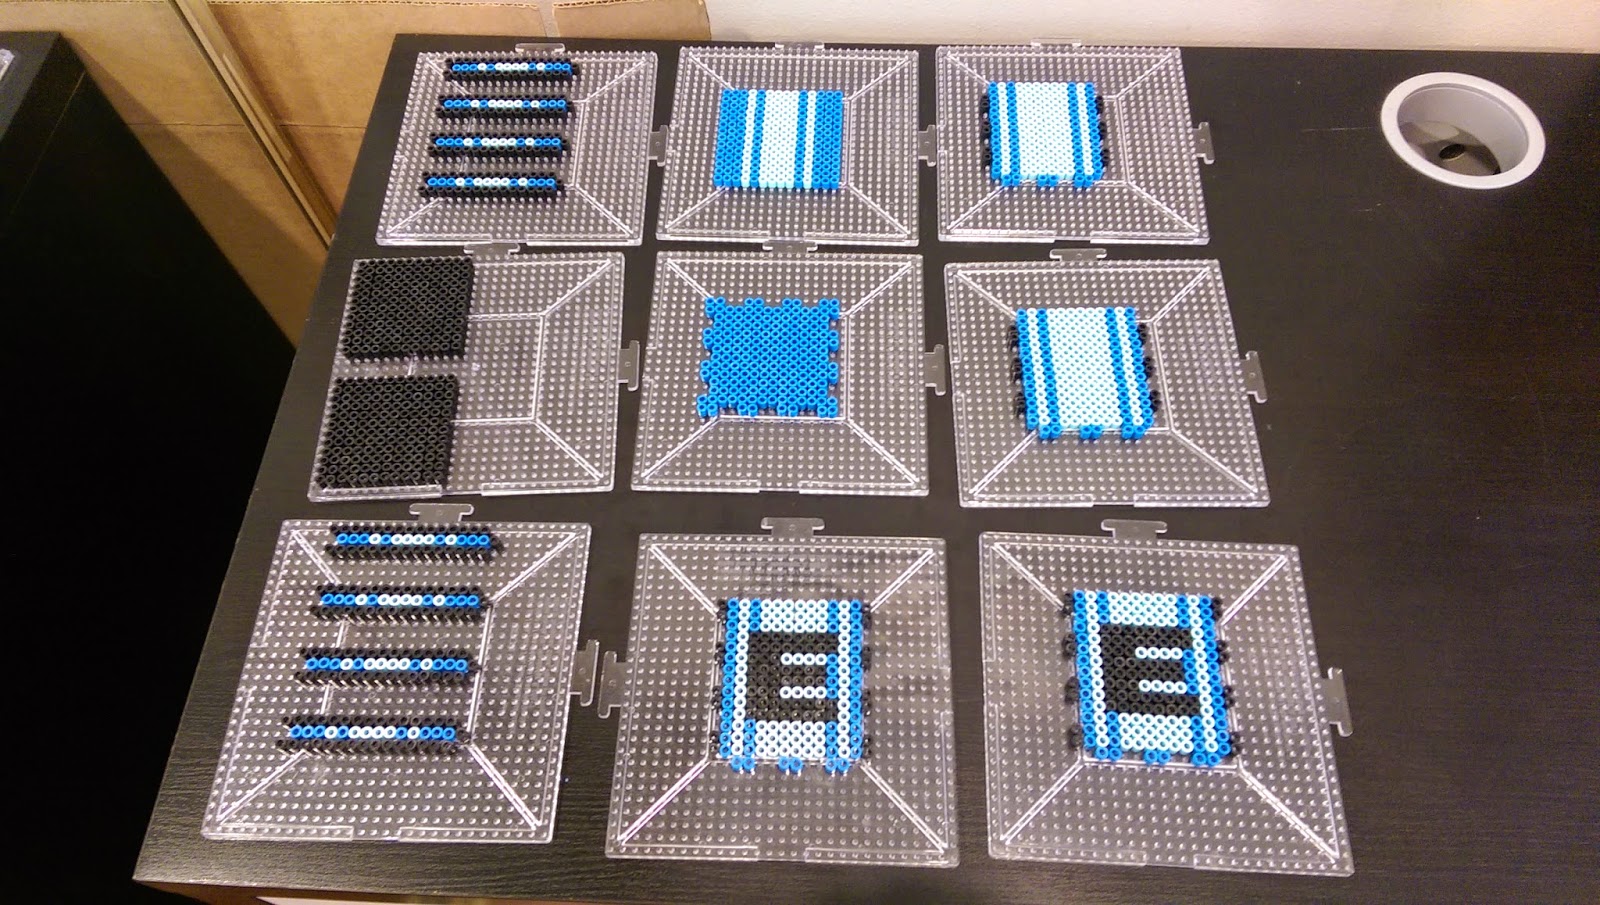 |
| All the pieces |
Top row (trays 1-3): the 4 strips that go around the top, the lid itself, and one side. Middle row (trays 4-6): the two black pieces go inside lining the lid and bottom for additional structural security, middle tray is the bottom, and rightmost tray is another side. Bottom row (trays 7-9): the 4 strips that go around the bottom, and the two remaining sides.
 |
| Finished product |
To construct: carefully snap together the pieces on trays 3, 5, 6, 8, and 9 (the 4 sides and bottom of the cube). Slide one of the black squares on tray 4 into the resulting cube and nestle it snugly flush with the bottom. Then break out your hot glue gun. Carefully glue each of the 4 strips on tray 7 to the bottom 3 rows of beads on each of the 4 sides of the cube. The 4 strips should snap together, but the hot glue secures them to the cube itself. (Both sets of strips are identical, by the way.)
 |
| Megaman Energy Tank |
To assemble the lid, first secure the second black square from tray 4 onto one side of the lid (tray 2) using hot glue. Make sure that the black square is fully centered. If you do this correctly, you should still be able to see a row of beads from the lid itself surrounding the black square, like so:
 |
| Underside of the lid, pictured after completion |
Last of all, carefully glue the 4 strips from tray 1 to the sides of the lid. Only put hot glue along the back of the top row of beads on each strip, and line that row up with the side of the lid. Again, each strip should snap at the corner to the next strip, and the hot glue will secure them all to the lid itself. If you don't get too much excess hot glue on the back of the strips, the lid should fit snugly onto the rest of the cube. Please wait until all the hot glue is done cooling before putting the lid on for good though - you don't want to accidentally glue it to the cube!
A quick shout out to BrYaN55 on the Pixelgasm forum for posting this tutorial, which I used as reference and modified to make my own Energy Tank. If you find any of my instructions unclear, you may find that secondary source helpful too. The main difference is I modified the sides, bottom, and strips to be interlocking to minimize the amount of glue needed for construction.
No comments:
Post a Comment